
Photo color correction is an important part of the editing process that can take your photos to the next level. It involves adjusting different elements of a photo’s color to make it look cleaner, more vibrant, and more professional. It can be done manually or with help from an editing software program. This article will provide some tips on how to make photo color correction easy and effective.
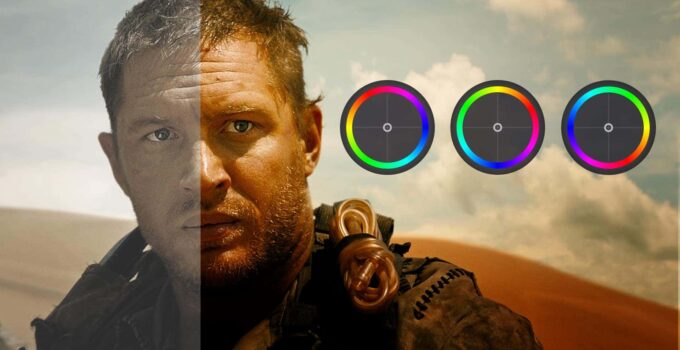
Benefits of Photo Color Correction

Source:imageworkindia.com
Photography means capturing life’s moments in all of their beauty and often requires color correction to make them look their best. In order to ensure that photos are represented accurately, it is essential to use color correction and other editing techniques such as exposure or tonal adjustments or some kind of Photo Enhancer. With the help of these tools, photographers can balance the tones and brightness of a photo, making the subject more pleasing to look at. The following are some of the advantages of using photo color correction:
- More accurate representation – Untouched photos can appear washed out or with inconsistent brightness levels. Correcting colors in a photo, allows photographers to portray the image much more accurately.
- Increased visual impact – It makes a huge difference in how viewers interpret an image. By improving its contrast, attention can be drawn to certain elements, with those elements standing out amid bright and vibrant colors. This allows photographers to capture images that are visually appealing and memorable.
- Color consistency across multiple images is important for anyone trying to establish a brand identity or tell a consistent story through photography. With careful manipulation of saturation levels and an eye on consistency between different shades, any photographer should be able to produce balanced colored images that work together well when presented together in series.
- Better decision-making – By using different software applications for color corrections professionals can adjust several parameters at once and view images side by side; this makes it easier for picture editors or creative directors to assess photos on the spot without having to constantly go back and forth between different versions looking for minute changes or effects that weren’t quite right previously.
Understanding The Theory
In photography-specific terms, color correction requires knowledge of how certain hues interact with each other including Hue Saturation Value (HSV), also called HSB (Hue, Saturation, and Brightness). This is because it affects the way an image appears on display platforms such as monitors or printers. Mastering an understanding of HSV can help to effectively manipulate a given image by altering its tonal range conventionally mapped from 0 to 255 (black to white). Additionally, some photographers use primary color correction tools to adjust an image’s tonal range by adjusting its Hue Saturation Balance (HSB) within Photoshop or Lightroom.
Understanding how light reflects off different surfaces and manipulating settings for hue saturation manually or through specific software programs allow skilled photographers to achieve desired results within digital prints. While this may seem time-consuming and complex initially it can be simplified by breaking down each aspect into manageable parts before creating whole creative works within seconds.
Working with Color Spaces

Source:frame.io
The two most common color spaces used in photography are RGB (Red-Green-Blue) and CMYK (Cyan-Magenta-Yellow-Key). Both RGB and CMYK play very important roles — each is appropriate for certain projects, depending on the requirements of what you are creating.
RGB profiles use red, green, and blue values to produce a wide range of colors. This system is ideal for digital projects requiring high brightness, such as when working with web images or video content. RGB also produces exceptionally bright results when printed — however, RGB must be converted into CMYK before being printed onto any physical substrates like paper or canvas.
CMYK was created specifically for printing purposes and consists of Cyan (blue), Magenta (red), Yellow, and Key(black). Together they create a much wider range of colors than could ever be displayed on an electronic device like a computer or phone screen; this makes them perfect for high-resolution images like large fine art prints. When converting from RGB to CMYK prior to printing, it is important to remember that not all colors will remain consistent due to their different makeup values. Colors tend to dull slightly after conversion from RGB profile into CMYK — something to keep in mind while editing!
Enhancing Tones
Color tones can be split into two primary categories: global and local. A global adjustment has an overall effect on the image’s color balance and needs to be applied with caution as it can easily lead to oversaturation or unrealistic results. Local adjustments are made within isolated regions of an image and enable greater control over isolated elements.
Shadows, mid-tones, and highlights are all parts of the tonal range that can be manipulated and enhanced through tools such as Curves or Levels adjustments. With these basic tools, you can lift shadows or darken highlights for overall contrast improvement or emphasize certain colors within shadows/midtones/highlights for a more dramatic effect.
Vibrance and Saturation sliders allow you also adjust an image’s ‘pop’ but again ought to use with caution — especially during critical tasks in which colors must remain accurate (for example, product photography). Using masking tools such as layer masks and range selections one may selectively apply these enhancements only to some areas rather than apply them globally throughout an entire image — thus retaining accuracy while stretching creative boundaries even further.
Finalizing the Color Correction
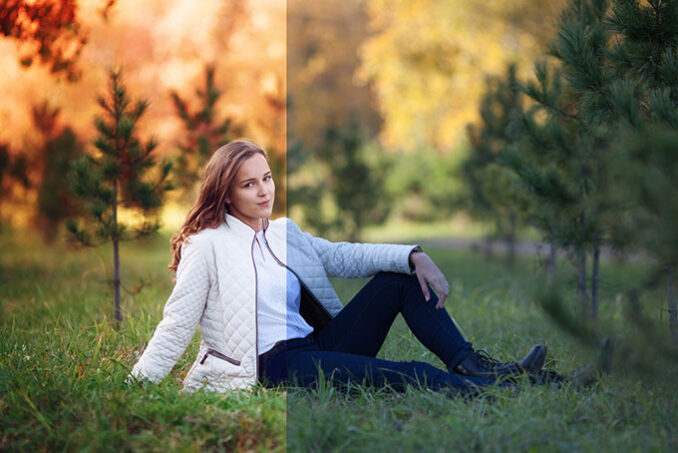
Source:smartphotoeditors.com
If you’re looking to improve the color accuracy of your photos, there are a few things you can do. Adjusting the white balance in your camera can help fix an overall yellow or green tint while using filters and adjustments in photo editing software can give you more specific results for fixing specific colors. Ultimately, it’s important to experiment with different methods until you find one that gives you the results you’re looking for.


